在今年一月底時 Parse 突然丟下了一枚震撼彈(Moving On),隨著 Parse 服務將在一年後關閉的消息,同時也提到將會把 Parse Server open source 出來,如今兩個月過去了,釋出的 Parse Server 也趨於完善,不只提供了許多雲端服務的整合方案,連 Parse Dashboard 也在三月初時 open source 了(Introducing the Parse Server Dashboard),雖然這個 Dashboard 目前並不像 Parse 線上服務的功能一樣完整,但在短短一個月內間又多了推播(push notification)功能頁面(Push and Config come to the Parse Dashboard),可以預見未來功能會越來越完整。
單純架設 Parse Server 的難度不高,在 GitHub 有對於要在 local 架設或是部屬到其他服務上如 Heroku 的範例教學,wiki 頁面也有更完整的解說,但從這裡開始我個人認為不是個好選擇,以指令方式去帶 appId 及 masterKey 總有可能會發生什麼意外。Parse 另外提供了 parse-server-example,這個對於入門來說會比較方便。
前置環境
- Node 4.3 以上
- MongoDB version 2.6.X or 3.0.X
- Python 2.x (For Windows users, 2.7.1 is the required version)
架設 Parse Server
先從 GitHub 上抓一份 parse-server-example 下來。
1
$ git clone https://github.com/ParsePlatform/parse-server-example.git --depth 1
將必要的模組裝上。
1
$ npm install
在
index.js中修改參數,可以選擇修改環境變數或是直接修改後面字串:- appId: 可填任意字串,用於識別 Parse API 的使用權限。在這裡用了
md5來產生隨機字串。 - masterKey: 可填任意字串,但不要公開此字串,用於覆寫權限設定。
1
2
3
4
5
6
7
8
9
10
var api = new ParseServer({
databaseURI: databaseUri || 'mongodb://localhost:27017/dev',
cloud: process.env.CLOUD_CODE_MAIN || __dirname + '/cloud/main.js',
appId: process.env.APP_ID || '7c6a1d1470fed0313b5044c4eb83def0',
masterKey: process.env.MASTER_KEY || '98584a6e0a2592c274d1e4eae44b0a7b', // Add your master key here. Keep it secret!
serverURL: process.env.SERVER_URL || 'http://localhost:1337/parse', // Don't forget to change to https if needed
liveQuery: {
classNames: ["Posts", "Comments"] // List of classes to support for query subscriptions
}
});- appId: 可填任意字串,用於識別 Parse API 的使用權限。在這裡用了
到這裡可以先執行看看。
1
$ npm run start
此時 Parse API 預設會掛在 http://localhost:1337/parse/ 下,有兩種方式可以測試是否運作正常:
- 直接到第五步驟,利用此包程式碼中的範例網頁來測試。
curl來測試 Parse 的 REST API 是否正常運作,X-Parse-Application-Id需改成在index.js中設定的appId。
1
2
3
4
5
curl -X POST \
-H "X-Parse-Application-Id: 7c6a1d1470fed0313b5044c4eb83def0" \
-H "Content-Type: application/json" \
-d '{"score":1337,"playerName":"Sean Plott","cheatMode":false}' \
http://localhost:1337/parse/classes/GameScore若正常無誤會得到以下類似的結果:
1
2
3
4
{
"objectId": "CT8BWvZ8Fi",
"createdAt": "2016-04-08T02:55:57.802Z"
}取值可利用以下指令來測試,
GameScore後面需加上剛剛回傳的objectId:1
2
3curl -X GET \
-H "X-Parse-Application-Id: 7c6a1d1470fed0313b5044c4eb83def0" \
http://localhost:1337/parse/classes/GameScore/CT8BWvZ8Fi正常的話即可拿回上一步所傳的內容:
1
2
3
4
5
6
7
8{
"objectId": "CT8BWvZ8Fi",
"score": 1337,
"playerName": "Sean Plott",
"cheatMode": false,
"updatedAt": "2016-04-08T02:55:57.802Z",
"createdAt": "2016-04-08T02:55:57.802Z"
}詳細操作可參考 REST API Guide。
在這個範例中有提供 REST API 及 Cloud Code 的測試程式碼,可以執行看看功能是否正常。
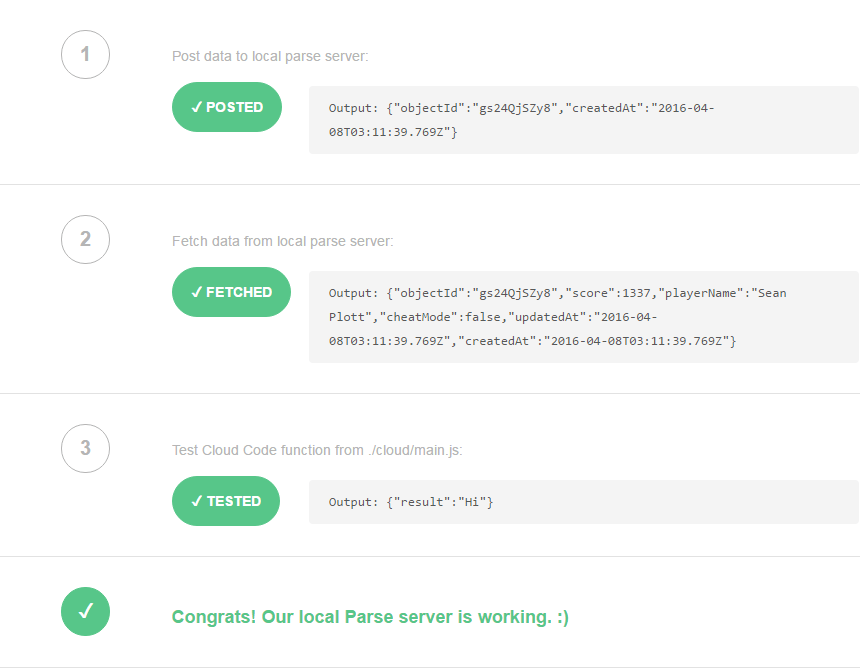
在public/assets/js/script.js中,將myAppId取代成自己目前的appId,共有兩處;接著開啟 http://localhost:1337/public/test.html 即可看到測試頁面,依序點選下方的POST,FETCH及TEST,若正確無誤的話應能看到以下結果:
看到這個結果就代表 REST API 及 Cloud Code 都沒有問題,下一步就看自己是不是要加推播通知的設定及 Dashboard 了!
參考資料: